Posts

Showing posts from 2011

Creating an Eclipse Dynamic War project from a Maven project is easy

The Maven Eclipse plugin is a great tool that lets you create an Eclipse project from a Maven project with just the mvn eclipse:eclipse command.  It always seems to work great on my big projects,probably  because someone has already done the configuration required to get the right information generated into .project and .classpath.   I've always struggled to make it work in a small demonstration or test project.  The maven constructed Eclipse project is never configured right and I can't run the war on my local Servlet container. Eclipse supports web files through the Eclipse Web Tools Project (WTP) project and through the Dynamic Web Facet when facets are enabled.  The Dynamic Web Facet is either missing or mis-configured after the  mvn eclipse:eclipse command. You must tell the Maven Eclipse Plugin (not to be confused with m2e) to use WTP when building the Eclipse project. The simplest command is:        mvn -Dwtpversion=2.0 eclipse:eclipse You must use the correct

Accessing the RabbitMQ Console in Cloud Foundry

Image
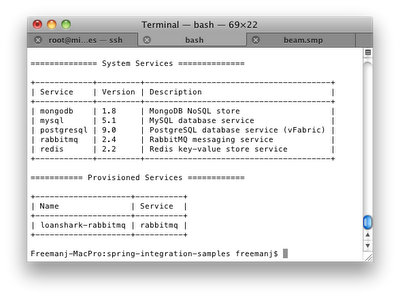
Cloud Foundry - PaaS Each Cloud Foundry instance is a self contained environment (cloud) that is generally intended to be use as a black box application container. It is implemented in a virtualized environment that hides the actual virtual/physical topology from the deployer.  Service configuration, provisioning, log viewing and application deployment are done from outside the cloud through external tools.  Cloud services may use any ports or other resources and use unique usernames and passwords for each instance. Applications rendezvous with services, at run time, via declared service names. Cloud services are not visible outside the container.  All system monitoring must be done through log files, through code deployed in the application or through tooling provided by Cloud Foundry. Service tunneling, where you can bind to the data port of a provisioned service, will be added to Cloud Foundry in a post 1.0 release.  This blog article  describes how it will work and how you can

Running RabbitMQ 2.6 and 2.7 on Mac OS/X

AMQP is an open protocol for Asynchronous message queueing.  The number one implementation for AMQP is RabbitMQ.   I normally run RabbitMQ on my Mac in a Linux/Ubuntu VM  but I recently got a new Macbook Air that's limited to 4GB.  I wanted to run RabbitMQ native on the Macbook Air instead of the Linux virtual machine to save space and give me better performance when running tcServer, RabbitMQ and STS on this slightly smaller machine.  Installation RabbitMQ is written in Erlang.  The Mac doesn't come with Erlang so you have to install it. You can use Macports or Homebrew per the Rabbit installation instructions .  I'm lazy so I used Rudix    Erlang-Solutions   which provides Erlang in neat Mac installation packages that put the files in  /usr/local /usr/bin. (The rudix version of Erlang went away over the weekend of 11/12/2011).  Download the img/package mentioned above and install it like any other .img file. Download RabbitMQ and unpack it into some worki

SeeedStudio 4x4x4 LED cube and Rainboduino

Image
Overview The Seeed Studio Rainbow Cube Kit is a 4x4x4 RGB LED kit with 64 tri-color LEDs for a total 192 connections. The kit comes with professionally designed components. A connector on the bottom of the kit is designed to mate up with the Seeed Studio Rainboduino which contains all of the drivers and connections needed to control an 8x8 tri-color LED array.  The LED cube comes nicely packaged with no installation instructions, schematics or hints.   The LED Cube does have it's own wiki page , which is probably the worst wiki page on the planet with no schematics, theory of operation or description of what kind of line driving is required by controller board. The LED cube wiki does contain a link to a slick Rainbowduino driver program. Assembly instructions are available on the Seeed Studio site. Robotshop has done an instructable and has the assembly instructions on their site. The Rainboduino is an Arduino clone specifically designed for LED contr

Extreme Feedback aka Status Lights (Das Blinkenlights)

Image
Monitoring Automated Builds The Agile concept of continuous integration is useful no matter what the actual software development methodology.  This is especially true as teams grow, projects branch and activity increases.  We initially set up Hudson for our MAIN and FUTURE branches with one build per branch. Hudson notifies everyone about build failures via email. That works fine but it developers eventually suffer e-mail overload so we needed a more noticeable way of telling folks when builds are broken.  (For us, broken means either compilation or unit tests fail).   We purchased two Delcom USB powered lights and mounted them on the wall where everyone can see them. A Groovy script reads the Hudson build status for our two main branches using the CruiseControl (cctray.xml) URL and then sends commands to the build lights. The cctray standard is limited and doesn't show how far along a build and doesn't differentiate between compilation and unit tests. The Delcom lig

Adding an I2C device to a Chumby

Image
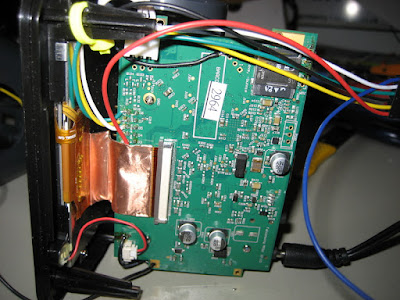
Chumby I2C The Chumby is a 3.3V device.  This means that you have to use 3.3V signal compatible devices.  Several of the JeeLabs I2C devices are 3.3V signal compatible. It is possible for some of the 3.3V I2C devices to control higher voltages either through their intrinsic design or through the use of opto-isolators or relays. I2C connection pins are available on the Hacker Port on most models. There are some internal devices at certain address so you have to make sure that you don't add additional devices that conflict.  I cut one end off of a JeesLabs extension cables and soldered it to the connector.  We don't use the IRQ line so it can be removed or taped off to avoid shorts.  This is pretty straightforward. I2C uses 7 bit addressing on a bus that does 8 bit transfers.  The thrifty I2C folks make use of the extra bit as a R/W bit.  They standardized on the addresses in the upper 7 bits and the R/W bit as the least significant bit.  This means that the address is sh

Installing a serial port connector on the Chumby/Infocast

Image
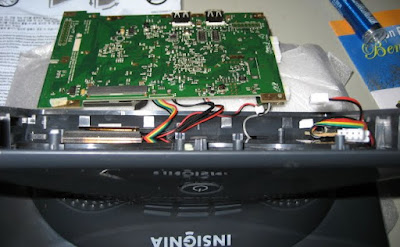
Overview Both the Infocast 8" NS-DP8CH and the Infocast 3.5" NS-DP3CH have 3.3v TTL level serial ports available on connector ports on the motherboards. The serial ports come with transmit (TX), receive (rx) and ground connections and are enabled by default by the Chumby operating system as the boot log on startup and as a serial based terminal after boot.  Traditional computer serial ports operate at different voltages and modern computers often have no serial ports at all.  Developers and users can connect to the Chumby through the use of a USB to 3.3v serial device adapter cables.  Pre-made ftdi brand cables are available on the internet but a lot of folks hack up cheap or surplus USB-cell phone cables like the Nokia. The Chumby is a 3.3v system so don't use a 5v cable. Search on the internet for appropriate cables. USB to serial cables appear to operating systems as (virtual) COM ports.  Mine shows up as COM4 on my Windows 7 machine.  Many terminal emulators communic

Hints on installing a qt webkit browser on the Chumby/Infocast

This Chumby Forum posting describes how to install a webkit browser on a Silvermoon/Infocast 8" device and on the Falconwing/ChumbyOne device.  Silvermoom Infocast 8" Setup   Download the pre-built browser usb image that is designed to run on a usb thumb drive (/mnt/usb).  Unpack the image to the root directory of the thumb drive.  Stick the thumb drive into the device and restart the device.  It should come up with the web browser on the www.chumby.com page.  This relies on the fact that the Chumby system will run  the debugchumby in the root of any thumb drive that is inserted into a usb port.  The debugchumby script can be customized with an editor to drive the web browser to any url that you wish. The system also supports a USB keyboard for URL entry if you are running the browser version with the URL bar. Webkit browser components can be built to operate in various ways.  The one from the package above runs as a window. The actual browser executable is in the de