Upgrading the HP Chromebook 14 (Falco) SSD
Walmart sells an HP Chromebook 14 with T-Mobile 3G for $350. The unit comes with 4GB of RAM and a 16GB SSD. The SSD is way more than you need as an average Chromebook user. Microcenter currently has the same Chromebook without the T-Mobile 3G for $250 with a 16GB SSD and $270 with a 32GB SSD. Linux heads and other nerds, like me, always want to upgrade their devices.
I recommend that you just a unit with the size SSD you think you can live with. Upgrading a Chromebook 14 NGFF SSD is not for the faint of heart. There are a bunch of small cables and at least 13 screws on the back and 3-5 inside that have to be removed. The keyboard is clipped into the base of the unit. Those clips must all be worked loose. The motherboard with the SSD on it is held in via 3-4 screws, the heat pipe linkage to the CPU behind the fan and the USB port openings on the left hand side

Of course I didn't listen to my own advice and bought the Chromebook because it is pretty much a laptop except for the small disk which gave me an excuse to take the unit apart. I'm assuming you have no intention of taking this advise either. MyDigitalDiscount http://Mydigitaldiscount.com is probably the best place to get the SSD. They have lots of success stories around various Chromebooks. The main flow for doing a replacement is:
 The HP Chromebook comes in several loud colors. Its a good thing it comes with 7 hours of battery life to offset that.
 The screen is low resolution but has nice brightness and color. The machine is quite speedy.
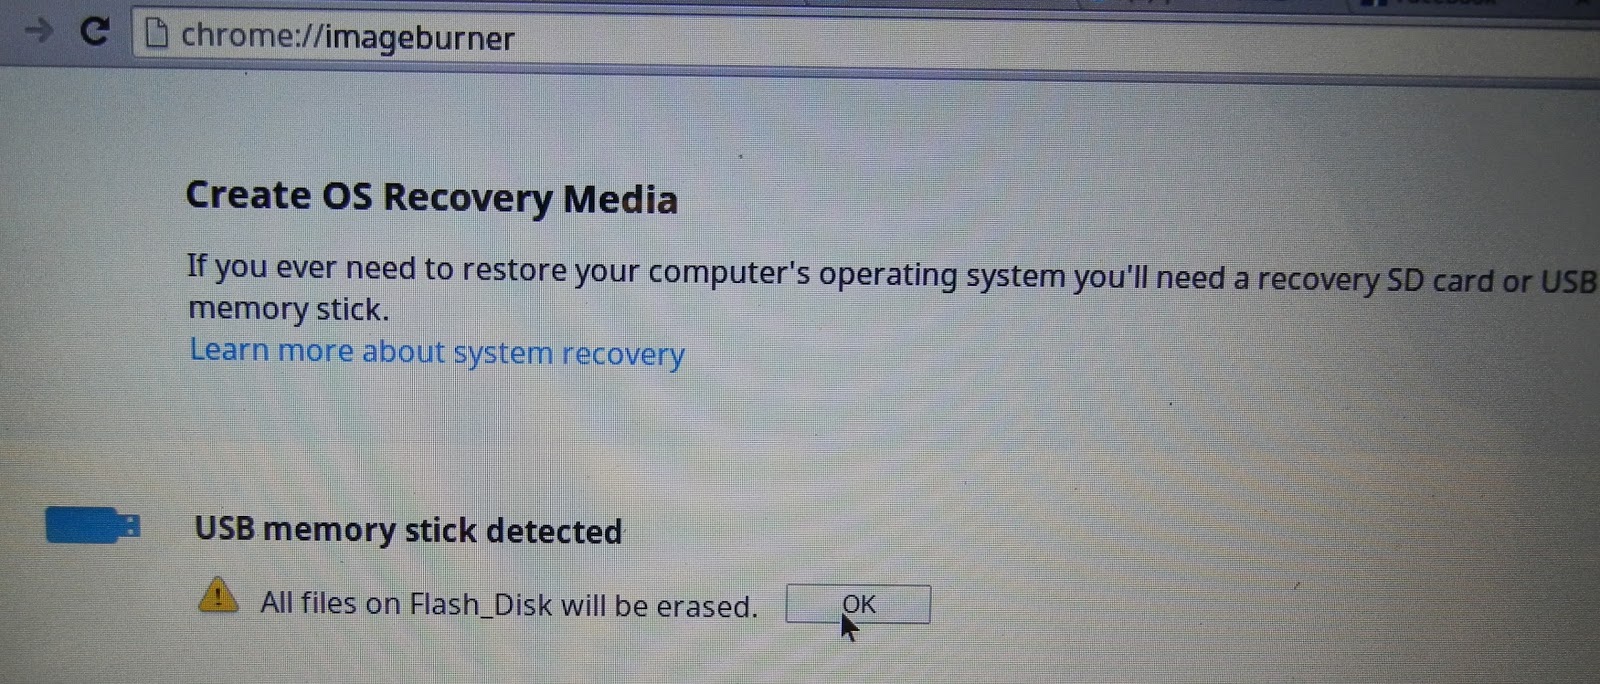
This shows the screen you see when you enter chrome://imageburner Clicking "OK" here will download the image and burn it to the memory stick.
 Chrome OS will automatically expand the 440MB archive and put it on the Recovery Media
Take the machine apart per the hardware instructions in http://chromebook-falco.blogspot.com/2013/11/here-are-mechanics-of-ngff-ssd-removal.html. You will restore the O/S once you put it back together. No SSD prep is required before insertion.
 This is the screen you see when you power up the Chromebook after swapping the SSD. It wants you to insert a Recover Media so it can install the O/S
 The Chromebook installs the Chome OS and then restarts.
I recommend that you just a unit with the size SSD you think you can live with. Upgrading a Chromebook 14 NGFF SSD is not for the faint of heart. There are a bunch of small cables and at least 13 screws on the back and 3-5 inside that have to be removed. The keyboard is clipped into the base of the unit. Those clips must all be worked loose. The motherboard with the SSD on it is held in via 3-4 screws, the heat pipe linkage to the CPU behind the fan and the USB port openings on the left hand side
Of course I didn't listen to my own advice and bought the Chromebook because it is pretty much a laptop except for the small disk which gave me an excuse to take the unit apart. I'm assuming you have no intention of taking this advise either. MyDigitalDiscount http://Mydigitaldiscount.com is probably the best place to get the SSD. They have lots of success stories around various Chromebooks. The main flow for doing a replacement is:
- Back up any personal data. Most of your stuff is probably in the cloud because that's the beauty of using a Chromebook.
- Create a recovery disk using an SD card or USB thumb drive. Enter chrome:/imageburner in the chrome browser. It will download the correct chromebook image for the HP Chromebook 14 and burn it to the card/drive
- Take the machine apart. Use this http://chromebook-falco.blogspot.com/2013/11/here-are-mechanics-of-ngff-ssd-removal.html awesome walk-through. I was going to write this up but there really is no point with a guide like this one
- Swap the disk as part of step 2.
- Put the machine back together as part of step 2.
- Stick the recovery image back in the SD or USB slot.
- Power up the machine.
http://chromebook-falco.blogspot.com has a bunch of interesting posts on how to dual boot, partition and do other various technical tasks.
Gratuitous Images
The HP Chromebook comes in several loud colors. Its a good thing it comes with 7 hours of battery life to offset that. The screen is low resolution but has nice brightness and color. The machine is quite speedy.This shows the screen you see when you enter chrome://imageburner Clicking "OK" here will download the image and burn it to the memory stick.
Take the machine apart per the hardware instructions in http://chromebook-falco.blogspot.com/2013/11/here-are-mechanics-of-ngff-ssd-removal.html. You will restore the O/S once you put it back together. No SSD prep is required before insertion.
This is the screen you see when you power up the Chromebook after swapping the SSD. It wants you to insert a Recover Media so it can install the O/SThe Chromebook installs the Chome OS and then restarts.
You should see the "brand new" Chromebook wizard screens when you restart after the O/S installation.
Conclusion
It is fun upgrading your own "non upgradable" hardware. It is also risky so think before you do this. You can end up with $300 of scrap. Read this blog http://chromebook-falco.blogspot.com/2013/11/here-are-mechanics-of-ngff-ssd-removal.html for a deeper overview of the upgrade process. I don't know this person. I just like their detail.