Make Azure learning credits visible in the coffee shop domain

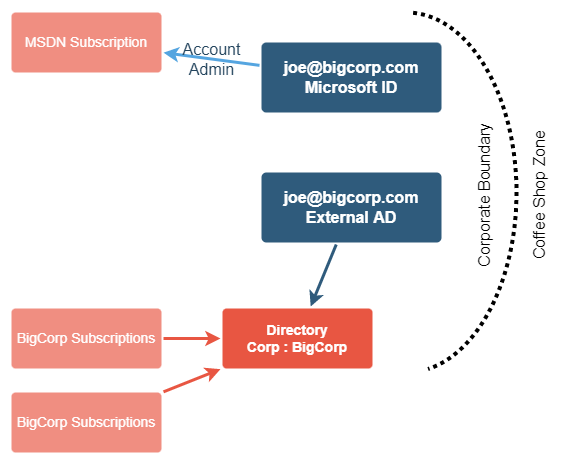
Both accounts have the same email domain which means they both have corporate accessibility zone restrictions even though the two accounts are not connected in any way and have no way of seeing each other's resources.
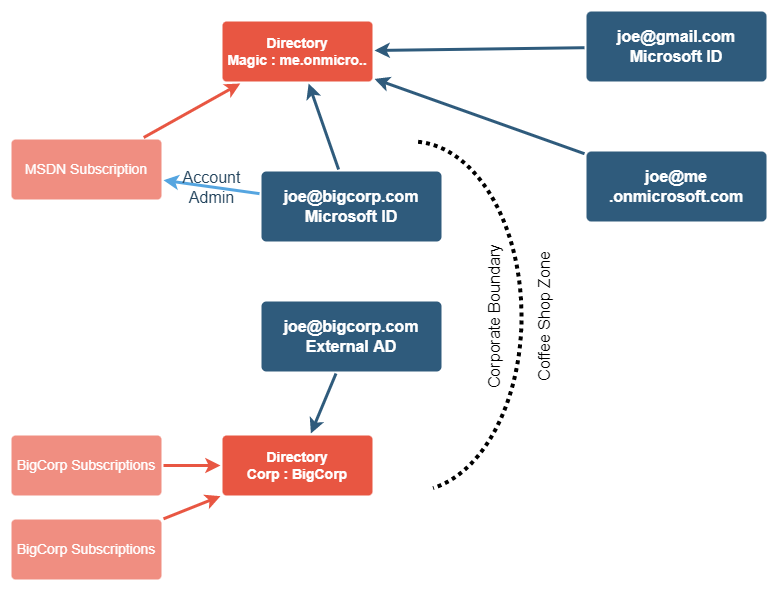
We can share this subscription with your personal, non-corp domain, account or create an ID that only exists in the ID that is tied to the subscription. This lets you learn Azure while sitting at home or the coffee shop.
This blog assumes you are allowed to use your Azure credits for your education from personal gear. If not, then stop here.
Video Discussion
Initial State
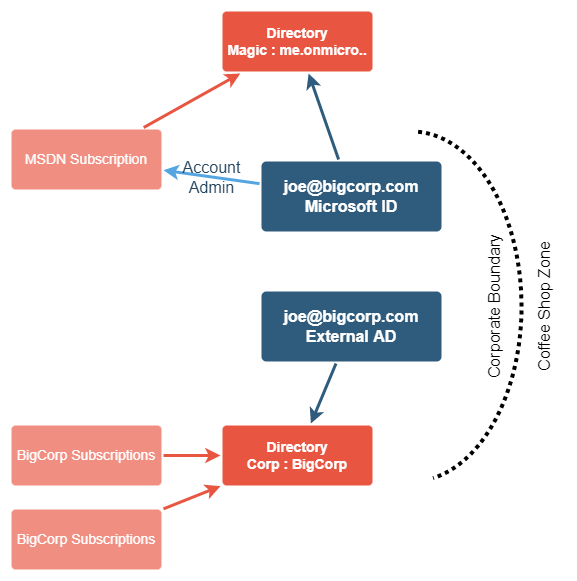
Setting up your MSDN Subscription
Add your users
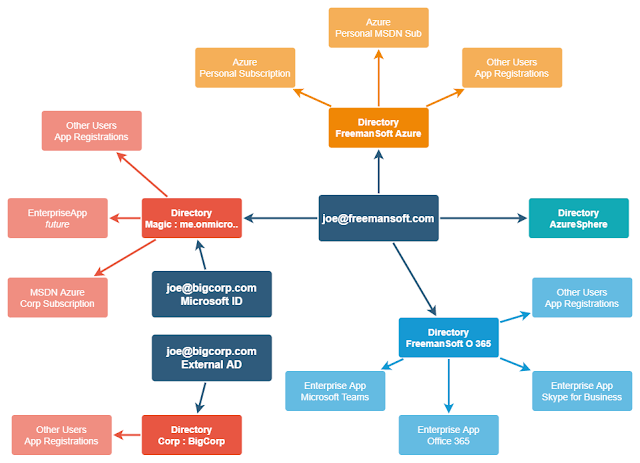
All together now
Steps - Too Brief
Create a domain/tenant, own it, move the subscription
- Log in to Azure Portal using the account that is the Subscription owner
- Create an AD tenant if you need one
- Azure Active Directory
- Click on Manage Tenants
- Click on Create
- Enter the Organization Name and Domain Name
- The example will use magic and <something-unique>.onmicrosoft.com
- Make it happen
- Wait a while for the tenant creation process to complete
- Make sure you are still in the old AD tenant. If not, change to your new tenant.
- Click on your login name/picture in the upper right.
- Click on switch directories.
- Select your old directory, not the one just created.
- Change the Directory your subscription is bound to
- Go to the Subscriptions blade
- Select Change Directory --> in the panel
- Select the newly created directory as the tenant.
- Move the subscription
- Wait 10 minutes
- Change to the new Directory using Change Directory in the profile dropdown
- Enable access to the AD Tenant billing information
- Navigate to Azure AD
- Click on Properties
- Enable Access management for Azure resources
- Give our ID owner role for the subscription.
- Navigate to the subscription
- Select Access Control (IAM)
- Select the Role Assignments tab
- You should see yourself as the User Access Administrator. This is not an Owner.
- Add an Owner role assignment
- Click on Add --> Role Assignment
- Select Owner
- Click Next
- Select the user in Assign access to
- Click Next
- Click on Review and Assign and make it happen
- Verify you can create something like a Resource Group
Create a new developer user in AD
- Navigate to your Azure Active Directory.
- Click on Users on the left site
- You should only see the account you are currently logged in as, assuming this is the first time adding a user.
- Click on New User
- Create a new account or invite an existing user.
- If you create a new user, not invite, then it will end up being something like <user>@<tenant domain>. Record the password. You will be prompted to change it the first time you log in.
- If you invite an external user then you have to click on the invitation email link to activate.
- External users are guest users with permission limits. You can change the state of the user from guest to member after they are activated.
- Verify the new directory user can log in via the Azure Portal on another machine or in another browser.
Give the new user AD permissions
- Make the user a Global Administrator.
- Navigate to Azure AD
- Click on Users and then our new user
- Select Assigned Roles which show the roles on the Azure Directory itself
- Click on Add Assignments
- Select the Global Administrator role and the new user
- Click through and make it happen
Give the new user permissions on the subscription
- Navigate to the subscription Subscriptions --> <our subscription>
- Select IAM
- Click on Add --> Co-administrator
- Select the new user.
- Click on Add
- Click on Add --> Owner
- Select our new user
- Review and Assign
- You should see two owners, the current one and the newly created one.
- Navigate to Active Directory
- Click on Users
- Click on Azure Role Assignments
- You should see the two permissions for the new users, User Access Administration and Owner
- Log in to the added ID in a different browser.
- Navigate to Active Directory
- Click on Users
- Verify permissions


Comments
Post a Comment